Xen Orchestra
Table of Contents
Installation
Use the script XenOrchestraInstallerUpdater to install Xen Orchestra from sources.
Installation within VM
The supported distibutions are listed in the Github README.
The script can be run with # ./xo-install.sh --install
Installation from dom0
For an installation from dom0, you can deploy a premade VM.
Run # xo-vm-import.sh to import that VM.
Installation as container
You need to explicitly allow host loopback for the container, or it won't be able to access the local ssh tunnel we'll create later
We'll need to enter the server on 10.0.2.2 with the local port we gave our ssh tunnel
podman run -itd --name xen-orchestra \
    --net slirp4netns:allow_host_loopback=true \
    -p 8080:80 \
    docker.io/ronivay/xen-orchestra
Secure Connection to Xenserver
By default, dom0 exposes the Xen API on port 443. However, in public settings this would be a security risk, as anyone with enough time could find the access password.
A local SSH tunnel is established, forwarding port 443 on dom0 instead.
One prerequisite is ssh-key based access to dom0 from the xen orchestra VM. See SSH
Based on testing and this forum post it is known the Xen API returns the dom0 public IP address for additional connections within Xen Orchestra. This includes the VM console and usage statistics for example.
To work around this issue, a firewall rule can be used to redirect traffic outbound to dom0 on port 443 to the local ssh tunnel instead.
SSH Tunnel
To start and stop the tunnel automatically a systemd service is used. It is a special kind of service, similar to wireguards wg-quick@(vpn config) in its function.
/etc/systemd/system/local-tunnel@.service
[Unit]
Description=Setup a local tunnel to %I
After=network.target

[Service]
EnvironmentFile=/etc/default/local-tunnel@%i
ExecStart=/usr/bin/ssh -i ${PATH_TO_KEY} -o ServerAliveInterval=60 -o ExitOnForwardFailure=yes -nNT -L ${LOCAL_PORT}:${REMOTE_ADDR}:${REMOTE_PORT} ${REMOTE_USER}@${REMOTE_HOST}
RestartSec=15
Restart=always
KillMode=mixed

[Install]
WantedBy=multi-user.target
The corresponding config looks as follows:
/etc/default/local-tunnel@evileye
PATH_TO_KEY=(path to key)
LOCAL_PORT=(local port, e.g. 4853)
REMOTE_ADDR=(destination, e.g. 182.52.32.12)
REMOTE_PORT=443
REMOTE_USER=(remote user)
REMOTE_HOST=(also destination in this case)
This service can be enabled and started with this command.
# systemctl enable --now local-tunnel@evileye.service
Firewall Redirection
firewalld will be used as firewall and to implement the redirection rule.
Make sure to enable the firewalld service
# systemctl enable --now firewalld
This command implements a redirection rule for packets to destination with destination port. Packets are redirected to localhost:port. The target port should be the local port of the local SSH tunnel.
firewall-cmd --permanent --zone=public --add-rich-rule='rule family="ipv4" destination address="(destination)" forward-port port="443" protocol="tcp" to-port="4000" to-addr="10.88.0.1"'Firewalld
This section provides documentation on basic firewall usage. For example, allowing port 22/tcp for ssh with firewalld.
In general, this guide by Digital Ocean provides a good starting point.
For this Host the services http, https and ssh are allowed.
VM Backups
Exclude VM Disks from Backup
To exclude disks from backup jobs, one can prepend the disk name with [NOBAK]
Also see the official documentation
Remove stale backups
Backup list has a stale entry - how do I remove it? ![]()
Xen Guest Tools
FreeBSD
pkg install xen-guest-tools xe-guest-utilitiesStart the agent
To make sure the service is run on every boot, put this line into /etc/rc.conf:
xenguest_enable=YESStuck VDIs attached to Control Domain
Screen can be found under Dashboard > Health
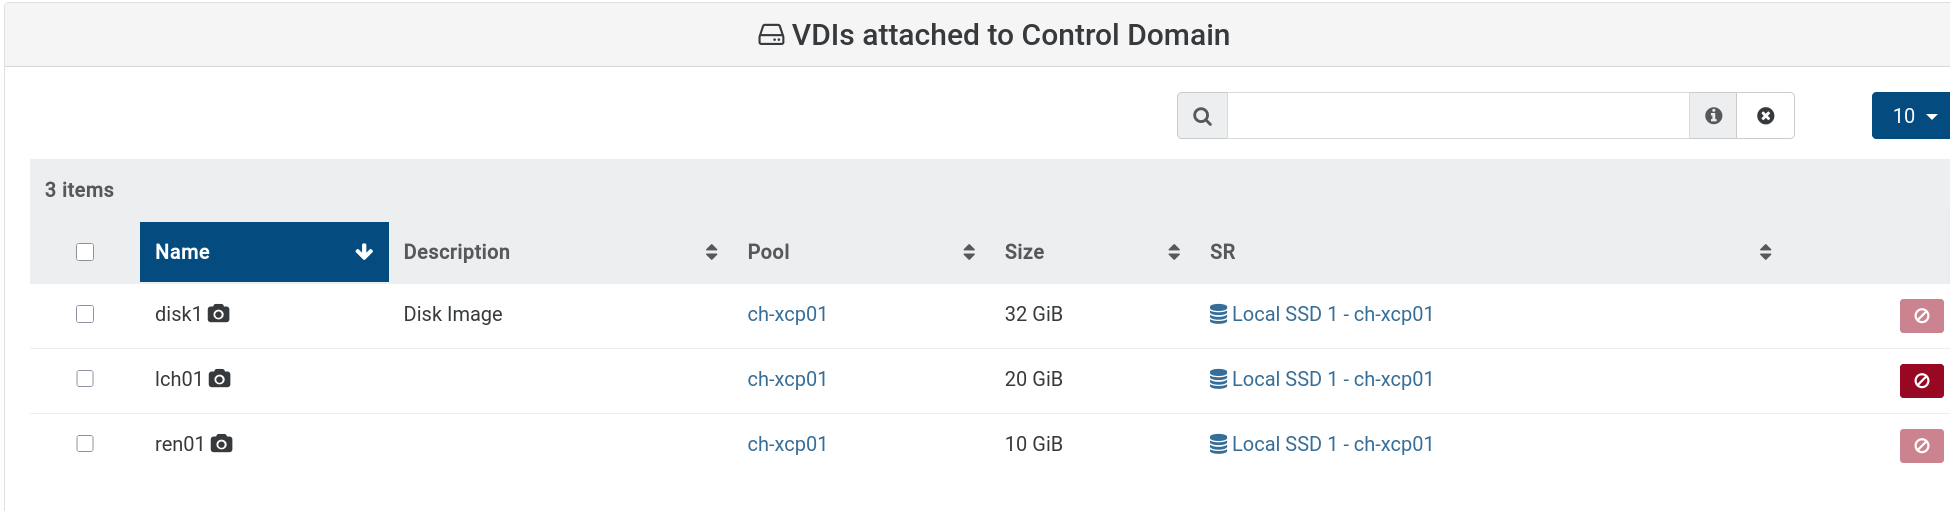
If the "forget" button doesn't work you have to manually do it using the xe CLI on the dom0.
- Log in to the dom0 where the disks are mounted
- Run
list_domains xe vbd-list vm-uuid=with the UUID for ID 0 from the previous command- Try to
xe vbd-unplug uuid=andxe vbd-destroy uuid=with the disk listed from the second command - If that doesn't work, use
xe vdi-forget uuid=
Health say: VDIs attached to Control Domain
Detach an SR - SR_BACKEND_FAILURE_1200